
Dimensions with door closed (side view.)
This would be the same if the dryer were stacked on top of the washer.
Pick a selection from the menu or scroll down the entire page to read it all.
Questions? Comments! Concerns? Report an error? Let us know! An e-mail should solve the problem.
 |
Dimensions with door closed (side view.) This would be the same if the dryer were stacked on top of the washer. |
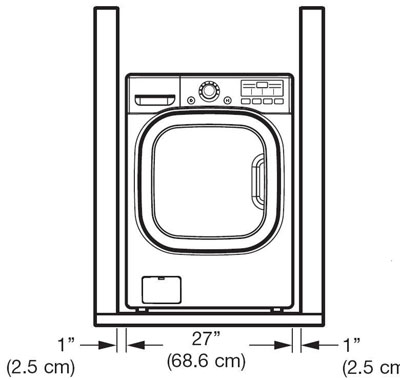 |
Space in laundry alcove (front view.) This would be the same if the dryer were stacked on top of the washer. |
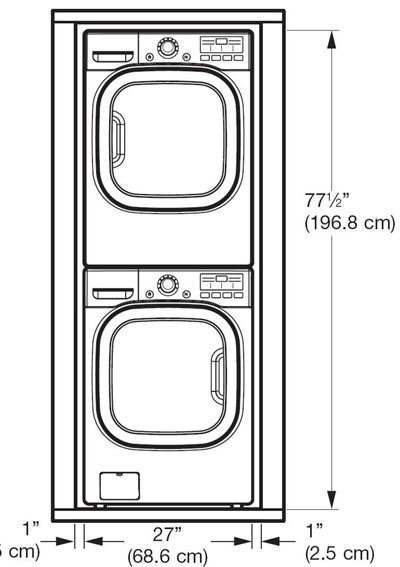 |
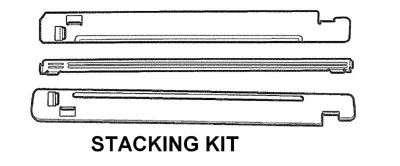
Dimensions with laundry pair stacked. The laundry pair can be stacked, but, if installed on a pedestal, the dryer controls would be 6Ĺ feet above the floor. It would be very difficult to see the display or operate the controls. (See below for information about stacking kits.) |
Questions? Comments! Concerns? Report an error? Let us know! An e-mail should solve the problem.
The washer comes with the two input hoses. The BLUE stripe
is for cold water and the RED stripe is for hot water. The hoses are NOT mechanically identical.
It is critical to the performance of the washer to have the hot and cold hoses connected correctly. The hot hose is made of a thicker material suitable for higher
temperatures and pressure.

The wrench is used to remove (and replace) the shipping bolts and to adjust the leveling feet. Be sure to leave it and encourage the customer to retain the wrench, the four shipping bolts, and the manual in a safe place in the event the washer requires service or the customer moves. Your wrench may vary from the drawing; some wrenches may have an extra hole in them for features in another market.
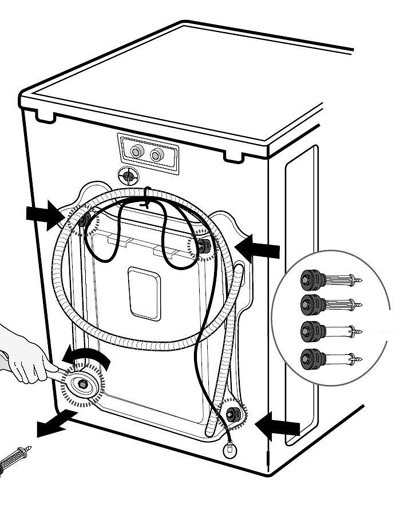 |
The shipping bolts MUST BE REMOVED before operating the washer. Wait until you're in the installation area to remove them. Do not transport the washer without having the bolts in place. |
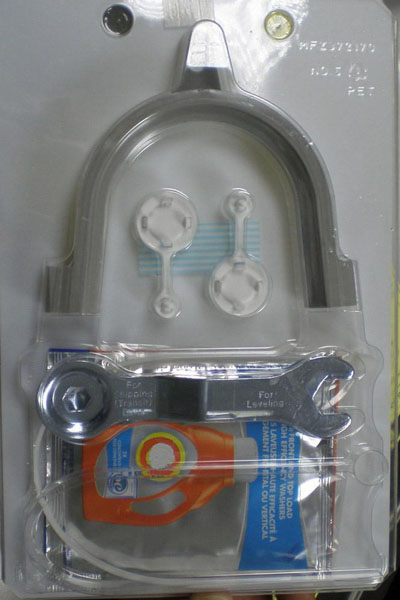 |
See the Rule of Twos concerning detergent usage. The wrench, shipping bolt hole covers, drain hose tie-down strap, and a sample packet of detergent are included in a packet shipped inside the washer. We recommend the RULE OF TWOS concerning the usage of laundry products. |
Questions? Comments! Concerns? Report an error? Let us know! An e-mail should solve the problem.
WARNING! Do not attempt this alone! At least two people are required to lift the dryer and place it properly on top of the washer. Failure to observe this warning could result in serious physical injury and damage to the appliances.
 |
Place the washer on a solid, even floor. If you plan to use a pedestal, install it now before going any further. |
 |
Peel the protective paper from the adhesive tape on the side bracket. |
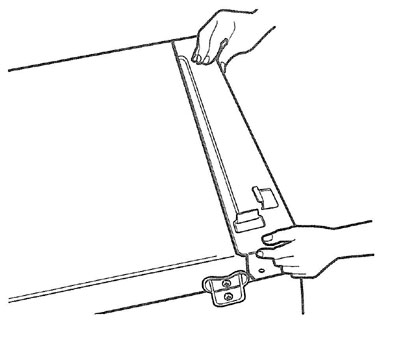 |
Fit the side bracket firmly to the top plate using the adhesive tape, as shown in the drawing. |
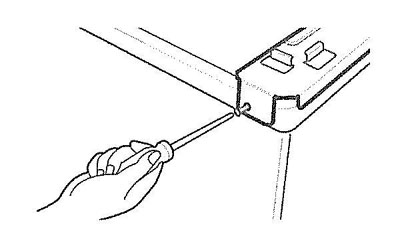 |
Secure the bracket to the top plate using a screw, as shown. Repeat these steps for the other side. |
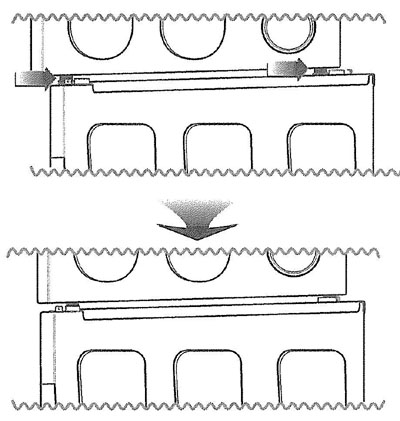 |
Level the dryer on a firm solid floor and lock down the adjusters before placing it on top of the washer. Lift the dryer on top of the washer it toward the front of the washer, as shown. Slide the dryer all the way back to the stop on the rail. |
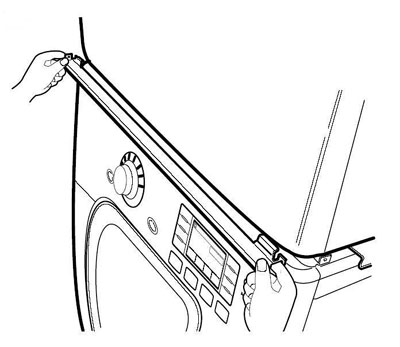 |
Install the front rail of the stacking kit. Push the front rail back against the stops on the side brackets. |
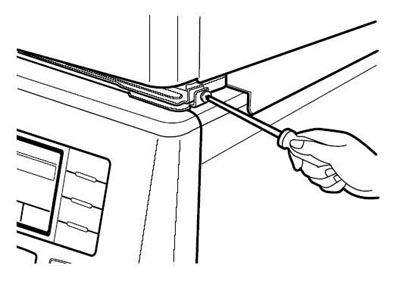 |
Insert a screw to attach the front rail to the side bracket. Insert the other screw for the other side. Tighten the leg down about half a turn to put a little tension between the dryer and the bracket to prevent rattling and vibration. |
Questions? Comments! Concerns? Report an error? Let us know! An e-mail should solve the problem.
Minimum clearances must be observed, particularly if the dryer is installed in a closet or a laundry alcove. The dryer is essentially an air pump moving 150 cfm (cubic feet per minute) and that air must come from somewhere for the dryer to operate properly. Additional air must be supplied to support proper combustion for gas models.
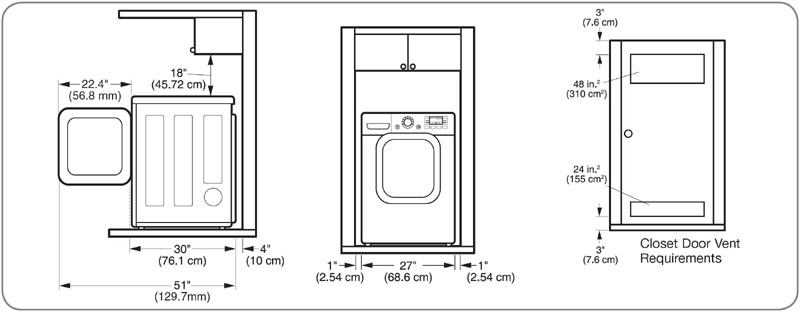
Questions? Comments! Concerns? Report an error? Let us know! An e-mail should solve the problem.
REMOVE THE SHIPPING BOLTS. LEAVE THEM WITH THE CUSTOMER.
The place to remove the shipping bolts is in the customer's laundry area.
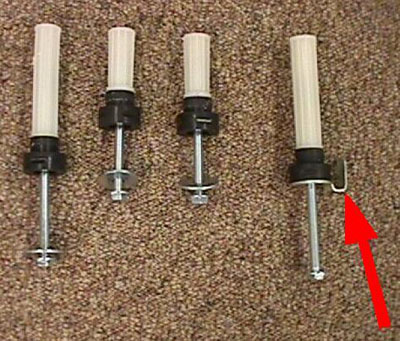 |
The lower right bolt is equipped with a clip that secures the cord so it is impossible to plug in the machine without removing the bolt. |
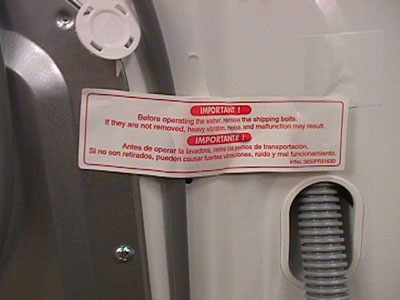 |
The cord is further secured by an adhesive sticker which must be broken to free the cord to plug in the machine. |
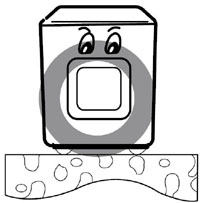
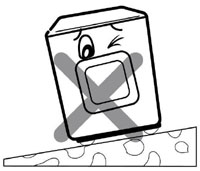
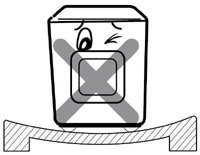
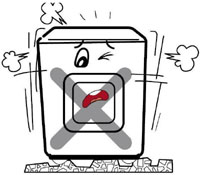
INSTALL THE WASHER ON A FIRM, FLAT SURFACE.
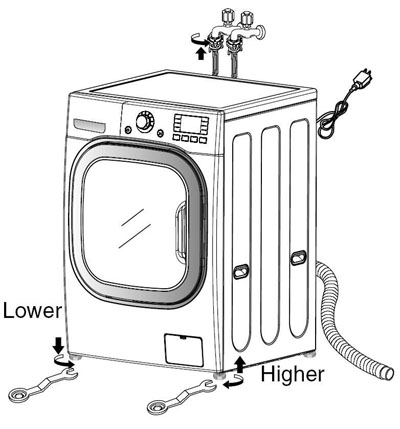 |
Adjust the feet to level the washer. Lock the adjusters in place. |
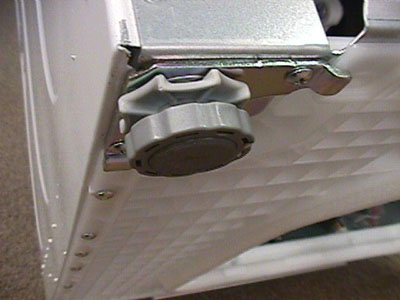 |
The feet can also be adjusted to increase the tension between the washer and the pedestal to prevent rattling. |
Questions? Comments! Concerns? Report an error? Let us know! An e-mail should solve the problem.
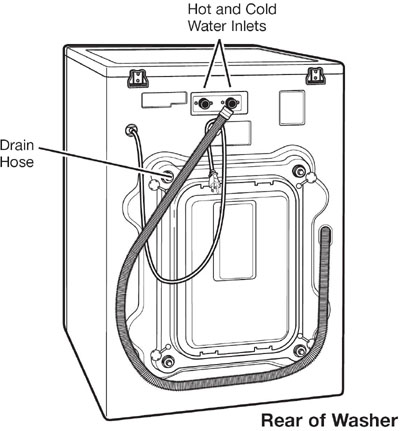 |
Be sure the rubber washer is inside the hose end. Attach the hoses to the washer (red is HOT, blue is COLD). Tighten them firmly but donít strip the plastic threads on the washer connections. The hoses are clearly marked by temperature. The HOT hose is thicker and has a higher temperature rating and burst strength. |
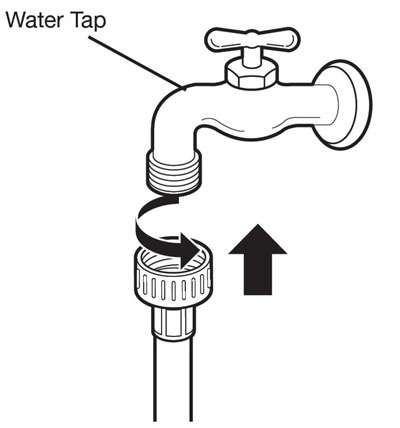 |
Be sure to use a rubber hose washer when attaching the hose to the hydrant. Tighten the connection firmly but do not strip the threads or deform the hose end. |
Questions? Comments! Concerns? Report an error? Let us know! An e-mail should solve the problem.
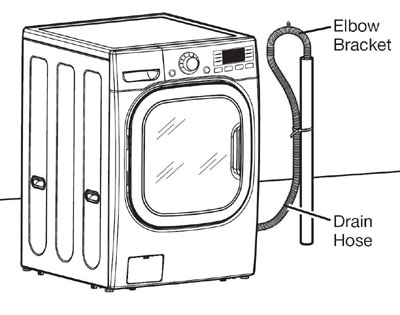 |
The drain pipe should be firmly attached to the standpipe or the laundry tub or sink where it drains. The pump has sufficient power to cause the pipe to move around when the water is expelled. The pump can lift the drain water a maximum of 96 inches (2.4 m), but there is no minimum height requirement. |
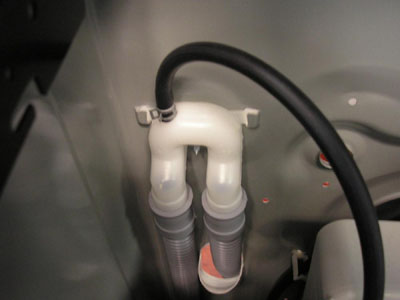 |
The vacuum breaker in the drain line will prevent drainage by gravity or siphoning. |
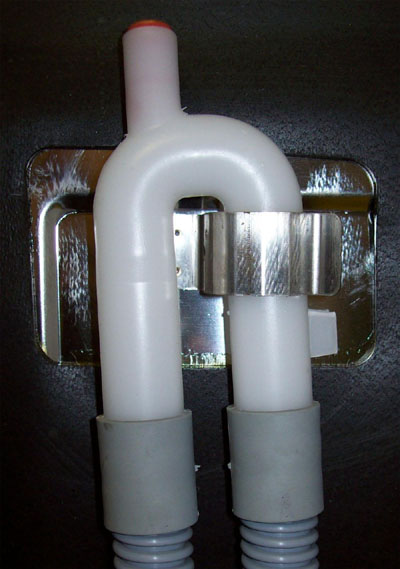 |
Some models may have a valve on the vacuum break and the tub in place of the hose that vents to the tub. The function is unaffected. The hose can lay flat into a floor drain as long as the end of it is not submerged. |
Questions? Comments! Concerns? Report an error? Let us know! An e-mail should solve the problem.
The steam washer requires a 120 VAC, 60 Hz., dedicated, 20-amp circuit.
Questions? Comments! Concerns? Report an error? Let us know! An e-mail should solve the problem.