 |
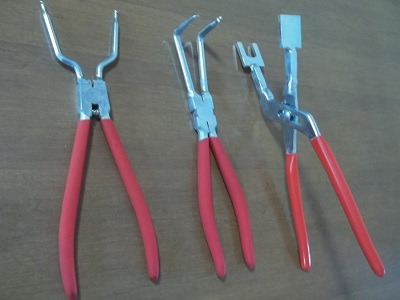
The set of three special tools for working on LG front-load washers. |
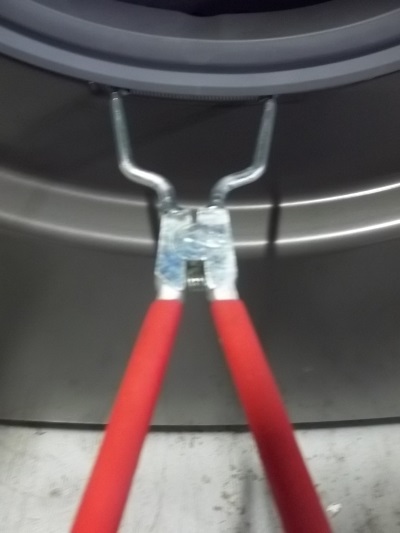 |
This tool spreads the spring clamp so it can be removed from the groove in the gasket and replaced just as easily. Using this tool will prevent damage to the spring and to the front cabinet of the washer.
Pat Number 383EER4001A |
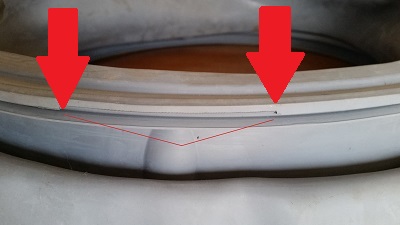 |
When installing the outer spring clamp, note there is a recess in the groove where the spring fits. This keeps the gasket from bulging and leaking where the spring is situated. Note that the recess is at the six o'clock position. If the gasket has become twisted or otherwise dislocated, it might be necessary to loosen or remove the inner clamp and replace it. Check the gasket for damage while you have it off the machine. |
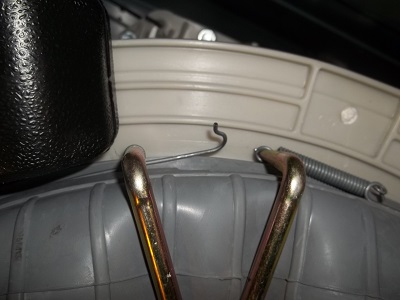 |
The tips are bent 90° to allow access without removing the front panel. The tips are also customized to allow both installing and removing the clamp. (For clarity, the clamp is not in place on the machine in this photo> Part Number 383EER4004A |
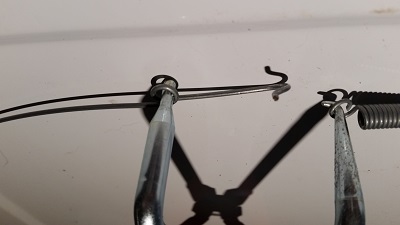 |
This photo shows the tips. The loop in the clamp allows the servicer to put pressure on the clamp to pull the loop end of the spring over the hook for removal or installation. |
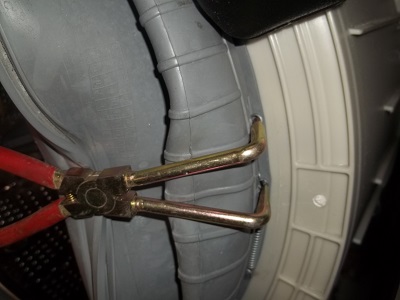 |
The inner clamp is a little trickier. The tool has bent tips, which, in theory, allow the servicer to remove and replace the clamp without having to remove the front of the machine. (The front is removed for clarity in the photo.)
Most servicers find it easier and raster to remove the front of the machine to perform this repair. |
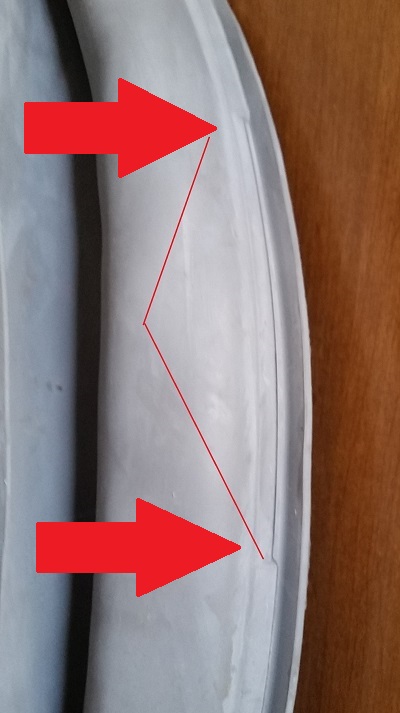 |
When properly positioned on the tub, the inner gasket has a recess to accomodate the clamp spring. The recess is located at approximately the two o'clock position.
If the gasket has become twisted or otherwise dislocated, it might be necessary to loosen or remove the inner clamp and adjust it. Check the gasket for damage while you have it off the machine. When replacing it on the tub, be sure it fits over the lip of the tub to prevent leaks. |
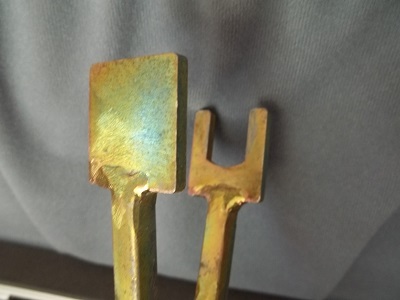 |
The damper pin tool makes the removal and replacement of damper pins quick and simple. Use the flat end to push the pin out; then, turn the tool over and use the flat end to push the pin back in as it passes through the forked end.
Part Number 383EER4003A |
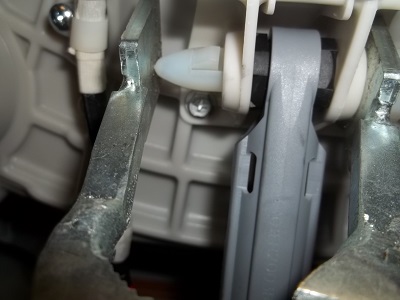 |
Be sure to push the retainer tab in when removing a damper pin. It will take care of itself when it is replaced. |
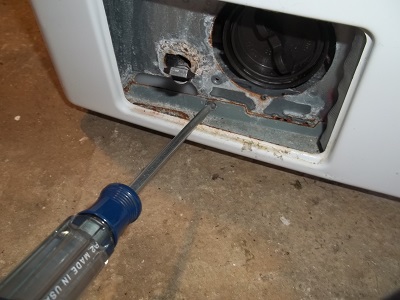 |
In the event you have to remove the front panel of a washer, you will likely run into this issue. Most of them have been in service long enough that spillage, overflow, detergent, bleach, water,and other things have leaked down in the front of the machine. The result is that this screw will become rusted and corroded and will be difficult to remove. Often the servicer will need an impact driver or find it necessary to drill it out. Whatever you do, be sure to replace it, or the front cover will rattle. |
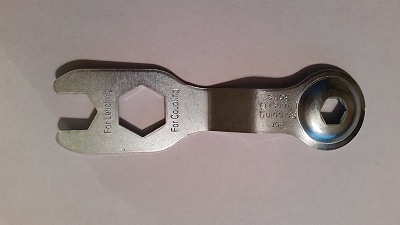 |
The installation wrench shipped with LG front-load washers. The
small end fits the shipping (transit) bolts. The open end is used to adjust the leveling legs when installing the washer. The wrench is shipped in a slot in the packing base of the machine.
Part Number 3W20018B |
Questions? Comments! Concerns? Report an error? Let us know! An e-mail should solve the problem.