Motor

LG Front Load Washer Training - Direct Drive Motor


38_1
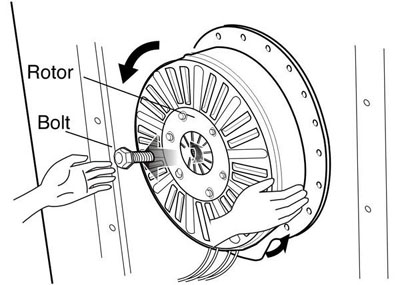
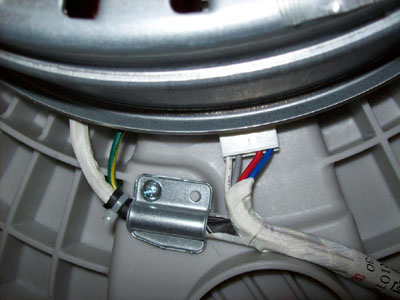
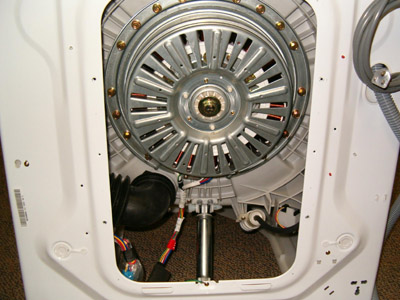
The motor is a direct-drive, brushless, DC motor. It is attached to the drum via a splined shaft, eliminating belts, pulleys, transmissions, and the inherent problems associated with them. The rotor is attached to the shaft by one large bolt. (17 mm)
38_2
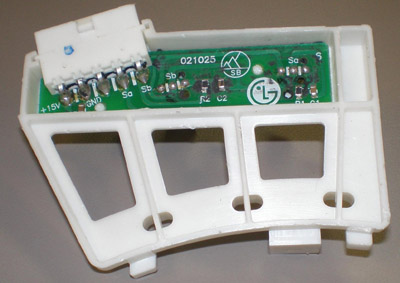
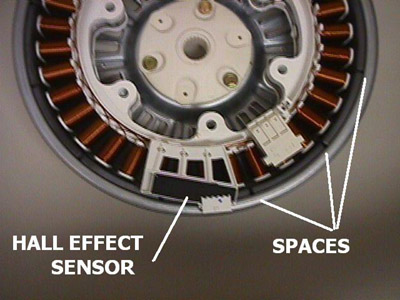
The DC motor can be driven from stopped to maximum speed in infinite steps in either direction. There are 36 poles on the stator; 12 permanent magnets spaced around the rotor. There are no brushes to wear out. Unlike a more traditional brushless motor, the rotor surrounds the stator rather than being attached to it. A hall effect sensor determines the speed and direction of the motor. It also can read that the load is off balance when the drum speed fluctuates.
38_3
The hall effect sensor is easily removed and replaced. You’ll have to remove the rotor and stator to access the sensor. When replacing the rotor, the drum may move forward enough to make replacing the bolt difficult. Carry a longer bolt in your toolbox to use to install the rotor, then remove and replace it with the factory bolt after the shaft has been pulled back and the rotor is pushed in place.
38_4
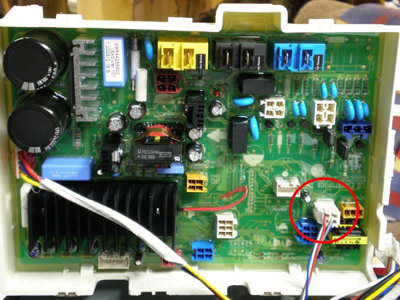
Before going to this trouble, check the connector on the main board. It is the white connector (circled in red.) Pull the connector off and verify the board is receiving a signal from the hall sensor.

(Click HALL SENSOR on the menu at the left for more information.)
51_1
Remove the back cover.

Remove the large bolt in the center shaft.

DO NOT stick a screwdriver or other object through the slots in the rotor. Use a rubber strap to hold the rotor or have a helper hold the drum.

Pull the rotor off the shaft.
51_2
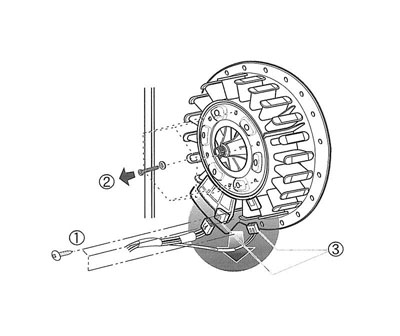
Remove the ground screws and wire retainers from the stator wires. The wires need to be free to remove the stator so you can fold it down and unplug the connectors.

Remove two screws from the tub bracket.

Remove six bolts on the stator. Lift it off and support it while you unplug two connectors on the stator.

Set the stator aside.
51_3
When re-installing the stator, the clamps and the ground screw must be installed and the connectors pressed into place before the rotor is bolted onto the shaft.

When you replace the rotor, the shaft can be pressed forward so far the bolt will not reach it. If you can’t hold the tub back while you install the bolt, get a longer bolt with the same thread. Place the rotor onto the shaft, install the long bolt, and pull the shaft back while you push the rotor all the way on. Then remove the long bolt and replace it with the correct bolt. Tighten to specification.

Questions? Comments! Concerns? Report an error?
Let us know!
An e-mail should solve the problem.