The range comes with the parts necessary to convert it to LP. Conversion includes the regulator and the surface burner orifices, or spuds.
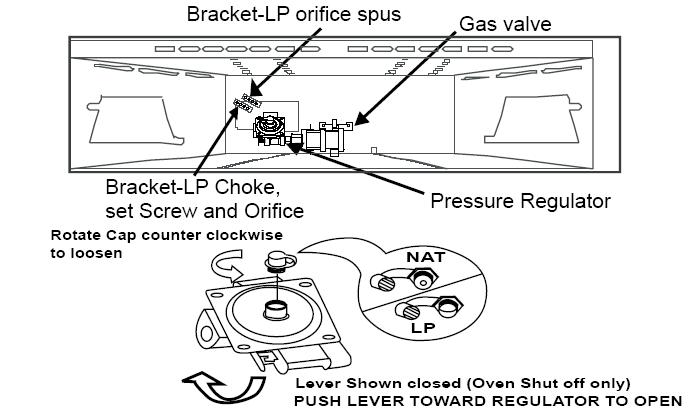
The regulator is located in the lower, left hand, rear corner of the range, as viewed from the front.
To access the regulator, remove the warming drawer.
Remove the large hex-nut which is located in the center of the regulator. Remove the plastic pin from the bottom side of the cap, turn the pin 180 degrees, and snap the pin back into the cap.
The hex nut is marked with NG for natural gas and LP for propane. There is an arrow showing which way to install the nut.
The nut pictured at the left is marked to install with the bottom end screwed into the regulator to set it for natural gas.
If you turn it over, you will see the LP marking. The long end goes into the regulator to set it for LP.
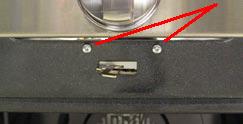
LP orifice spuds are located at the back of the warming drawer compartment. The spuds are in a metal bracket next to the pressure regulator and are attached to the back wall of the compartment by a ¼” hex head screw.
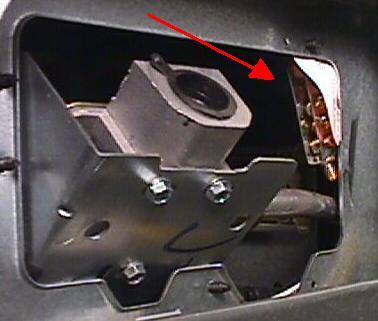 An LP conversion instruction sheet is also located in this area. (See drawing, next page.)
Remove the grates, burner caps, and burner heads. Then remove the brass orifice (spud) in the chimney of each burner using a 9/32” (7 mm) wrench or nut driver.
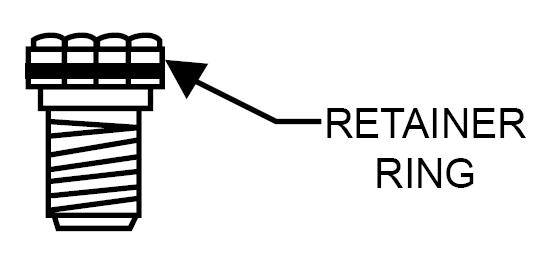
The orifices have spring-loaded retaining rings around the hex head to hold the orifice in the nut driver during installation and removal. A slight amount of force is required to push the nut driver down over the ring.
Install the LP orifice spuds into their correct positions as described as follows. A mark (I, II, or III) is engraved on the top of the orifice to denote the location of the orifice as shown in the illustration. The marks appear on both the LP and Natural Gas orifices. The locations indicated by the marks are the same for both gasses.
The LP orifices are color coded as well as marked with an L and the orifice size.
RIGHT FRONT	10,000 BTU	Orange/Light Brown
LEFT FRONT	 9,500 BTU	Blue/Brown
LEFT REAR	 9,100 BTU	Orange/Green
RIGHT REAR	 5,000 BTU 	Blue/Blue
CENTER		 5,000 BTU	Blue/Blue
To prevent leakage, make sure the orifices (spuds) are securely screwed into the gas supply tubes.

For the extra large burner (right front), the choke and self threading screw will be needed. Insert the choke into the burner base, then insert the set screw into the burner base and tighten securely. Make sure the screw head is against the shoulder (within the choke notch), so it does not have any rotational movement.
Replace the old natural gas spuds in the bracket and replace it on the back of the range in the event the range must be reverted to natural gas in the future.
Remove oven door, warming drawer and oven bottom. The oven burner orifice hood is located behind the warming drawer. The broil burner orifice hood is located on the right upper corner of the oven cavity.
To convert to LP, use a ½” wrench to turn the orifice hoods clockwise until it is snug with the base, approximately 2 ½ turns. To prevent damage when converting back to Natural Gas, do not over tighten the hood.
Open the air shutter on the burners to the full open position and adjust as needed.
(A) Yellow Flames
Further Adjustment Required
(B) Yellow tips on outer cones
Normal for LP Gas
(C) Soft Blue flames
Normal for Natural Gas.
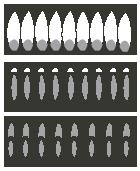
If burner flames look like A. Further air shutter adjustment is required. Normal burner flames should look like B or C, depending on the type of gas you use. With LP gas, some yellow tipping on the outer cones is normal.
The broil burner will cycle off when the sensor temperature reaches 460°F (238°C) set on Lo Broil, and at 570°F (299°C) set on Hi Broil.
Upon completion of the conversion, fill out the LP sticker located with the instructions. Once complete, apply the sticker to the back of the range near the regulator. If converting back to natural gas from LP, remove the LP sticker
from the back of the range.
Questions? Comments! Concerns? Report an error?
Let us know!
An e-mail should solve the problem.