5. Remove the burner.
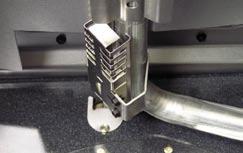
. . . continued from previous disassembly file . . .
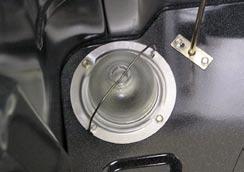
CAUTION! The glass cover should be removed only when cold. Be sure to let the cover and bulb cool completely. Do not touch a hot bulb with bare hands or a damp cloth. Replace the bulb with an appliance type bulb, 120 VAC and no more than 40 watts. If the bulb is not working, replace the bulb with a new one. The bulb should come on when the oven door is open. If that doesn’t resolve the issue, check for 120 VAC across the terminals. If 0 volts, check the door switch and wiring.
1. Unplug the oven.
2. Push the wire clip to the side and remove the glass cover.
3. Remove and replace the bulb.
4. Clean the glass cover using a wet cloth. Be sure the cover is completely cool.
The switch is on the left side of the door frame and is accessible from the front.
1. Unplug the oven.
2. Pull the switch forward to reveal the spring clips on each side.
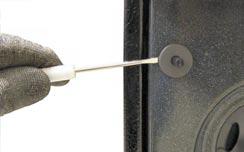
3. Depress one of the clips with a small screwdriver while pulling the switch out.
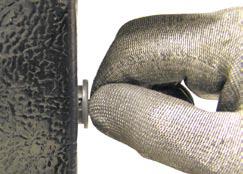
4. Depress the other clip and pull the switch free of the door frame.
5. Disconnect the switch wiring harness. Secure it so it doesn’t fall back into the hole.
The oven BAKE and BROIL burners are ignited by Norton style glow bar ignitors. The ignition circuits consist of the electronic control (main board), the ignitor, and the gas valve. The gas valve and the pressure regulator are supplied as a complete assembly. It is sometimes called a combination valve.

As shown in the schematic, the valve is in series with the ignitor (glow bar). When 120 VAC is applied, the ignitor requires a minimum of 116, leaving only about 4 volts to operate the valve. The ignitor will remain energized at all times the burner is operating.
From a cold start, the ignitor requires 30 to 60 seconds with a minimum of 116 VAC to reduce its electrical resistance sufficiently to provide a minimum of 2.9 amps of current flow in the series circuit. This is the required current flow necessary for the valve to open. The ignitor should provide a steady current flow of 3.3 to 3.6 amps (3.03 to 3.30 VAC) in the circuit, which keeps the gas valve open. If the ignitor ages and its resistance increases significantly, the current flow will decrease respectively, and the gas valve will no longer open.
If the ignitor glows red but does not draw a minimum of 2.9 amps, the failure is usually with the ignitor rather than the valve. ALWAYS check the gas valve on the pressure regulator to be sure it is not in the OFF position.
This range uses rectangular Norton glow bar ignitors. These are NOT interchangeable with cylindrical carborundum glow bars. They operate at different amperages and work in conjunction with different gas valves.
If the ignitor glows buy ignition does not occur, be sure the regulator valve is not in the OFF position. Slow ignition can be caused by the following conditions: blockage of the primary air intake, improper alignment of the orifice hood and burner, improper air/gas adjustment, blockage of the crossover slots on the burner, improper installation (drafts in installation area), or a faulty gas valve.
1. Remove the oven door.
2. Remove the screw that holds the burner in place.
3. Lower the burner.
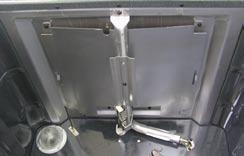
4. Remove the two hex head screws that hold the ignitor to the burner.
5. Remove the burner.

When reinstalling the burner, be sure the tab on the burner is inserted into the slot on the rear wall of the oven. Make sure the orifice hood is inserted into the burner inlet opening.

6. Remove the access cover from the back of the range and disconnect the ignitor connector.
7. Remove the wire retainer and gently pull the connector through the oven wall and remove the ignitor.
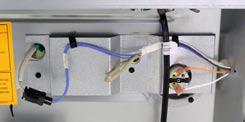
When replacing the ignitor, the connector end must be positioned OUTSIDE the range insulation. Do not allow the connector to be inside or next to the insulation. Allow the rigid over-sleeve to position the connector away from the insulation.
The insulation should be allowed to surround the ignitor lead wires, protecting the connector from any heat loss at the insulation opening.
1. To remove the bake burner ignitor, remove the oven door.
2. Remove the warming drawer.
3. Remove the bottom pan by removing two screws, lifting the back of the pan, and sliding the pan back until it can be removed from the oven.
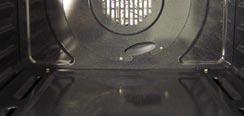
4. Remove the two hex head screws that hold the ignitor to the bake burner.
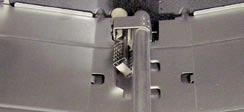
5. Disconnect the ignitor wires located behind the warming rawer. Gently pull the connector through the oven floor and remove the ignitor.
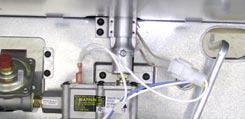
6. Remove the hex head screw that holds the front of the burner in place.
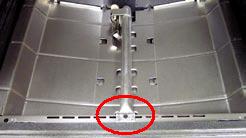
7. Remove the two hex head screws, located behind the warming drawer, that hold the burner in place and then remove the burner.
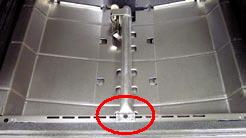
When replacing the bake burner, be sure the orifice hood is inserted correctly into the burner inlet opening.
Questions? Comments! Concerns? Report an error?
Let us know!
An e-mail should solve the problem.