Adjust Gas Pressure for Oven Online Training Manual for LG Products - Adjust Gas Oven Pressure      

BAKE and BROIL BURNER ADJUSTMENTS

WARNING!

28_1

A small amount of odor is normal and will be present when the range is first turned on. If there is a strong odor, the bake and broil assemblies should be inspected.

1.    Remove the oven door.
2.    Remove the bottom pan.
3.    Replace the oven door.
4.    Close the oven door and set the oven to BAKE at 350° F. Observe the bake burner flame.
5.    Set the control to BROIL and observe the broil burner flame.
6.    Allow the oven to cool and reassemble it.

Adjustments require disassembly of the burner section.

To avoid handling hot parts, the oven should be cool.
28_1

NOTE!

A small amount of odor is normal and will be present when the range is first turned on. If there is a strong odor, the bake and broil assemblies should be inspected.

1.    Remove the oven door.
2.    Remove the bottom pan.
3.    Replace the oven door.
4.    Close the oven door and set the oven to BAKE at 350° F. Observe the bake burner flame.
5.    Set the control to BROIL and observe the broil burner flame.
6.    Allow the oven to cool and reassemble it.


28_2

NOTE!

The oven door must remain closed when testing the bake and broil flames. The window should be clean before starting.

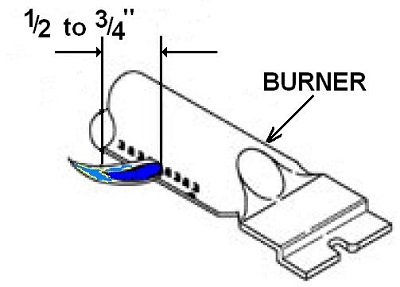
When testing the bake and broil elements, observe the flames for a minimum of two minutes. Give the burners time to reach operating temperature. The flame should not lift or blow off the burner during any period of operation. It should be blue with an inner cone between 1/2” and 3/4” (12 to 19 mm).

To correct a BAKE flame problem, remove the warming drawer, loosen the air shutter, and adjust the opening to 11/16”. Run the flame test. If the flames are yellow, open the shutter an additional 1/32”. If they lift off or flutter, close it by 1/32”. Repeat the flame test until the flame is acceptable.


REGULATING GAS PRESSURE

29_1

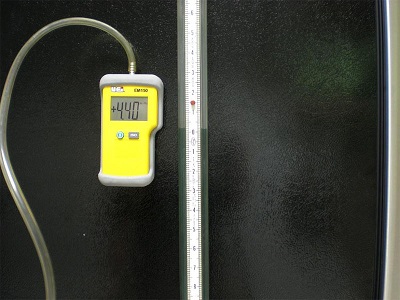
Correct gas pressure is essential for quick burner ignition, correct burner BTUH input, and to minimize the byproducts of combustions, such as carbon monoxide. The recommended regulated pressure for natural gas is 3.5 to 4 inches of water column. Likewise, for LP the recommended pressure is 10.5 to 11 inches of water column.

To measure the gas pressure, you’ll need either a digital or water (slack tube) manometer.

29_2

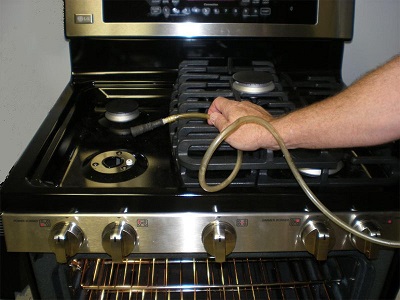
Measuring gas pressure can be easily accomplished at any of the 5 surface burners.
Remove a burner grate and one of the sealed burners. Then place the gas pressure measuring tube over the orifice.
With the pressure fitting over the orifice and the range unplugged, turn the surface valve to an open position and record the gas pressure.

If the gas pressure measured is incorrect, check the gas regulator cap position. If it is properly installed for the gas type (natural or LP), replace the regulator and retest pressure.


30_1

SAFETY VALVE and PRESSURE REGULATOR

WARNING!

Before servicing the range, disconnect the power and the gas supply. Be sure the oven is absolutely cool.

NOTE!

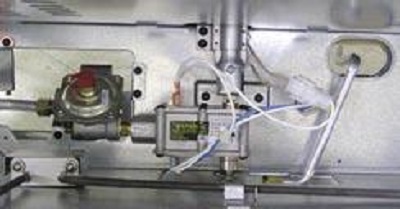
The pressure regulator and the safety valve are a combination unit (combi-valve) and must be replaced as an assembly.

NOTE!

The combi-valve is front serviceable. The amperage should be between 3.3 and 3.6 amps at 3.0 to 3.3 VAC.

1.    Remove the oven door.
2.    Remove the warming drawer.
3.    Remove the bake burner.
4.    Remove the gas line connections at the valve. (The line by the regulator is 11/16” and the line by the oven shutoff safety valve is 9/16”.)
5.    Remove the 5 hex head screws that secure the combi-valve.
6.    Remove the valve.


30_2

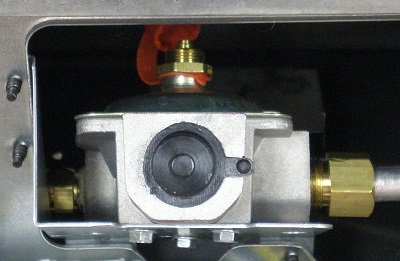
The regulator has an adjustment for converting the range from natural gas to propane (LP). The adjustment screw is marked to show which way is up for natural gas or propane (LP).

30_3

Note the marking that shows the short end to be installed for natural gas. On the other side, the arrow points toward the longer end for propane (LP).

Conversion includes changing or adjusting the orifices as well.


Questions? Comments! Concerns? Report an error?
Let us know!
An e-mail should solve the problem.