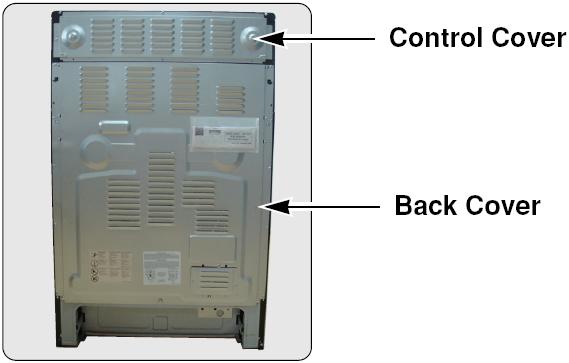
Remove 17 screws that secure the back cover. Remove the cover and stow it where it will not be bent or damaged.
• Always disconnect the power cord before servicing the range.
• Replace all panels and parts before operating the range after repairs.
• Reconnect all grounding devices, clips, pins, and wires. Failure to do this could result in personal injury, electric shock, or death.
• Wear gloves to protect your hands from the sharp edges of sheet metal.
 |
Remove 3 screws that secure the control cover. Remove the cover and store it where it will not be bent or damaged. Remove 17 screws that secure the back cover. Remove the cover and stow it where it will not be bent or damaged. |
 |
Unplug the connectors from the PCB. Remove 6 screws and take out the board. |
 |
Remove 6 screws from the cooktop display board and 1 screw from the control power supply. |
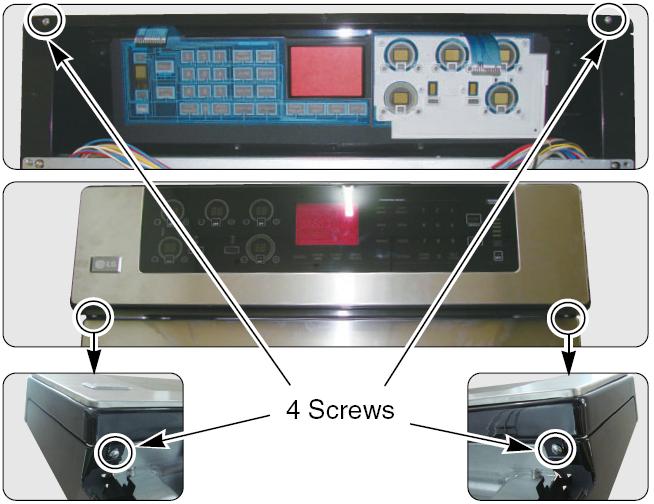 |
Remove 4 screws that attach the controller subassembly to the supporters. NOTE: Two of the screws are hidden under the bottom edge of the control panel. (See illustration.) |
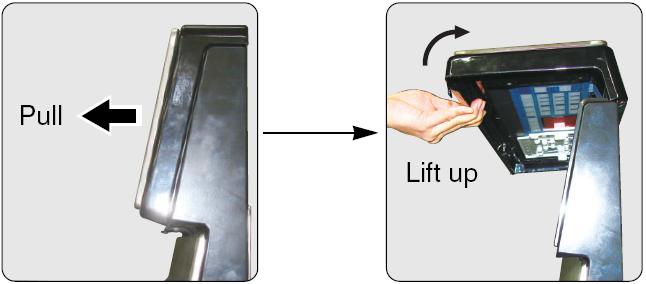 |
Pull the controller subassembly out at the bottom from the front and lift it up and over the top. |

|
To service the key membrane, the panel should be completely removed from the range. |
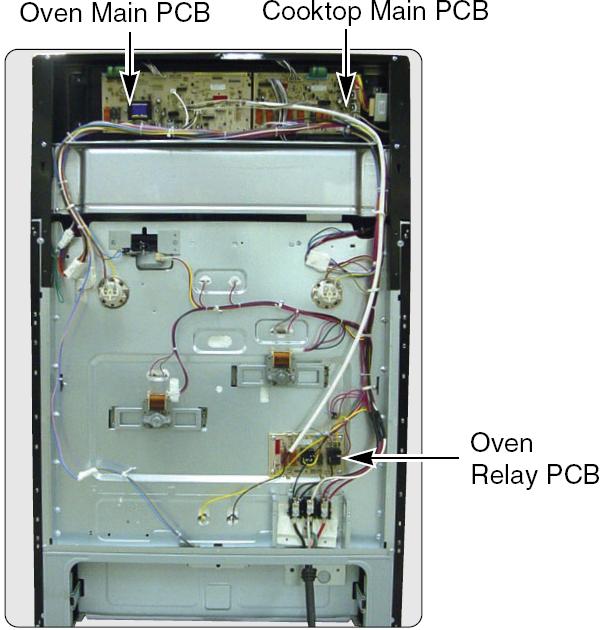 |
There are 3 power control boards in this range. When checking these boards, be sure to check the right one, make sure it is in default mode, and check the main board as well. The 3 power control boards are: • Oven Main Board • Cooktop Main Board • Oven Relay Board |
|
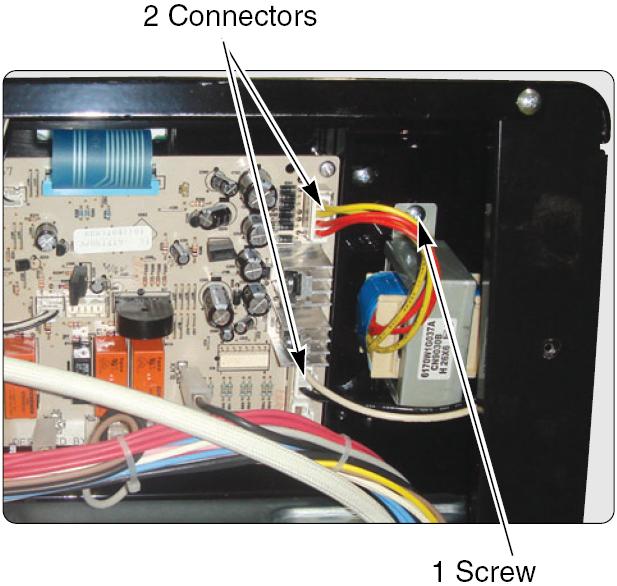
Unplug both connectors on the power control board. Remove the screw near the low-voltage transformer to remove the board from the range. |
Questions? Comments! Concerns? Report an error?
Let us know!
An e-mail should solve the problem.