Installation is covered briefly for the servicer who may need to uninstall and reinstall the dishwasher for repairs. For new installations, please refer to the installation guide that was supplied with the dishwasher.

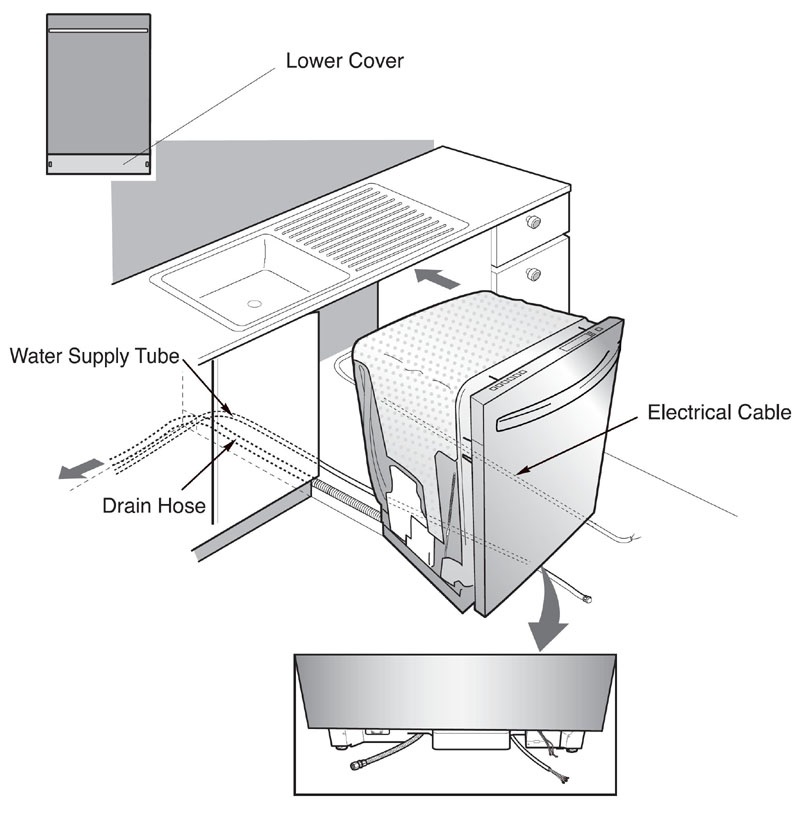
Drill a 1½” hole on either side to allow for the drain hose, water supply hose, and electrical cable. The opening must be in an area within 4” (100 mm) of the back wall and 4” (100 mm) of the floor.
If there is a floor in the cabinet under the sink, it will be necessary to cut through it to connect the water, drain, and electrical cable under the sink.

The dishwasher must be supplied with 120 VAC, 60 Hz, 1Ø current as indicated on the rating plate and connected to a properly fused and grounded dedicated 20-amp circuit.
The wire or water supply can be fed from either side, or both from the same side, depending upon source location.
They must be run in the channels under the dishwasher, as shown in the drawing.
The dishwasher may be connected to either hot or cold water. If the hot water can not maintained below 149° F, the dishwasher must be connected to the cold water supply. Lay out the water supply line as indicated on page 6 of this training manual. Use sealing tape or joint compound to avoid leaks.
The dishwasher can be hardwired if necessary and if permitted by local code. We recommend the use of a dishwasher installation kit, available at most hardware and home supply stored. This kit includes a cordset, a flexible water supply line, and the elbow connector necessary to connect it. Using a cordset requires an electric outlet under the sink accessible when the dishwasher is installed. The cordset makes it easier to disconnect the dishwasher from power while working on it and makes removal and replacement easier. As stated earlier, installation requires a properly fused and grounded dedicated circuit.
Exploded view of the left rear leg adjuster assembly. (Right rear similar.)

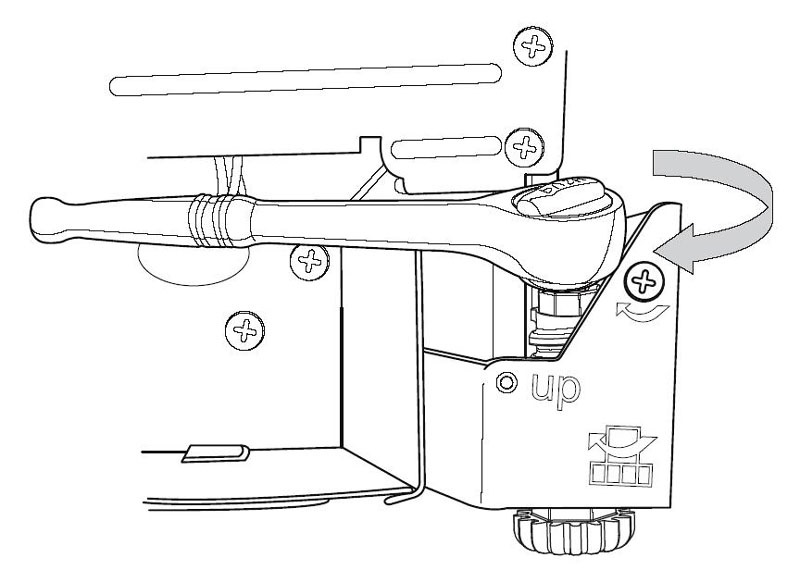
The front legs can be adjusted by using a ¼” drive wrench, as shown.
To complete the installation:
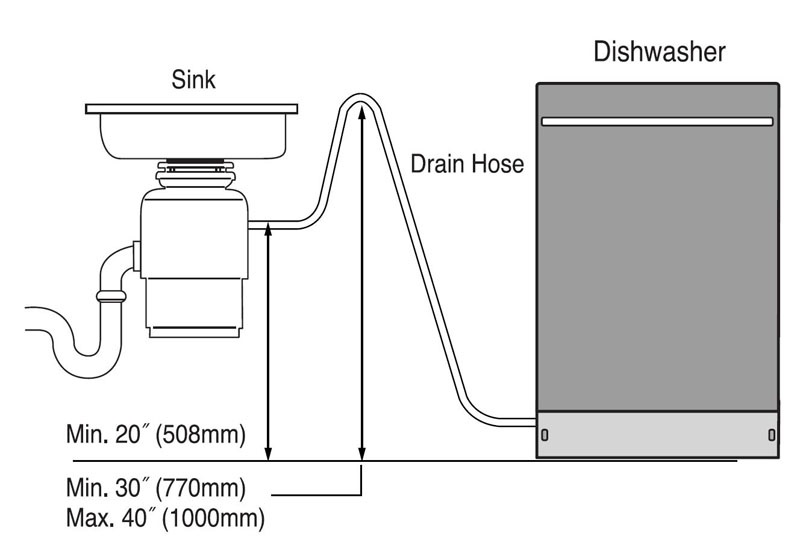
The drain hose must be connected in a manner that meets local plumbing codes. If the end of the drain hose does not fit the available connector, an adapter may be obtained from a local hardware or plumbing supplier. The rubber end can be cut off for the correct size attachment.

This drawing shows the drain line installed with a rise in the drain pipe but no air gap. It can also be with an air gap installed. Be sure to observe the clearances listed.
Most garbage disposers have a dishwasher drain fitting built in to them. If your installation does not include a disposer, you can use a special tailpiece with a drain attachment available at most hardware and home supply stores.

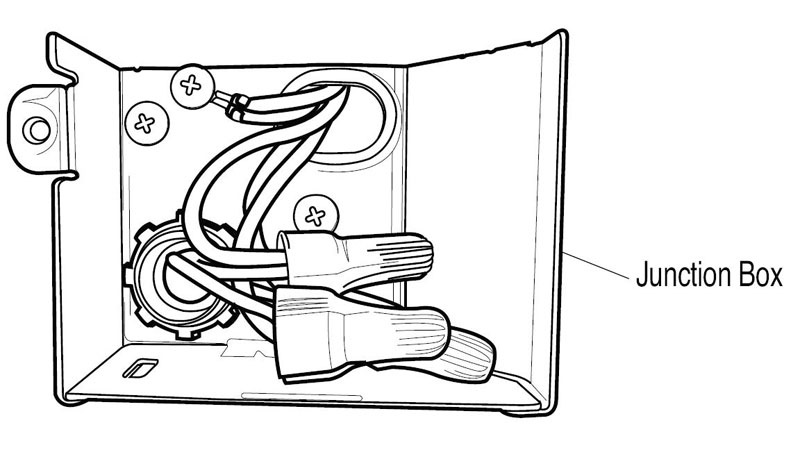
Use wire connectors and replace the cover on the junction box. (12/2 w/ ground, 20-amps).
When the door is closed, the top edge with the controls should be under the countertop.
Use the installation brackets to attach the top of the dishwasher to the bottom of the countertop, if necessary.
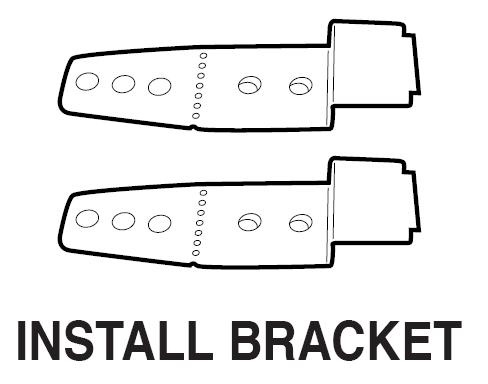
Insert a wood screw into the cabinet through the hole provided in the side of the dishwasher. Be sure to remove the plastic covers first.

Questions? Comments! Concerns? Report an error?
Let us know!
An e-mail should solve the problem.