The following pages will detail the disassembly and reassembly of the dishwasher during the normal course of diagnosis and repair.
Turn off the electric power at the source (or unplug it if your dishwasher is installed using a plug and cordset.)
Pull the dishwasher out from under the counter and turn off the water.
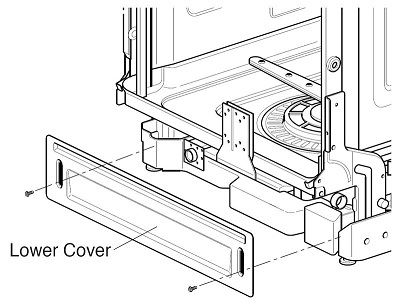
Remove the two screws that hold the lower cover (kick plate) in place.
Disconnect the water inlet hose at the elbow.
Disconnect the electrical supply at the junction box if the dishwasher is hardwired. (Unnecessary if the dishwasher is installed using a plug and cordset.)
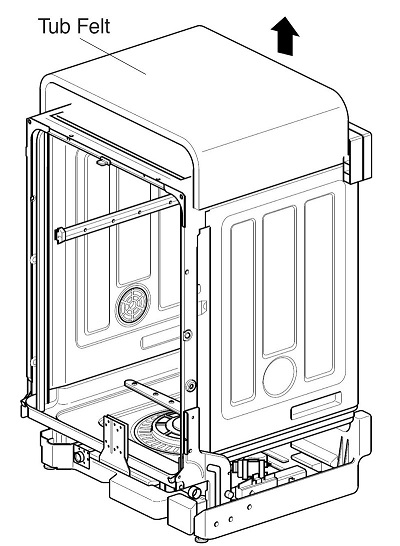
Lift the insulation blanket off the tub of the dishwasher and preserve it for replacement at the completion of repairs.
Open the door and fold it down.
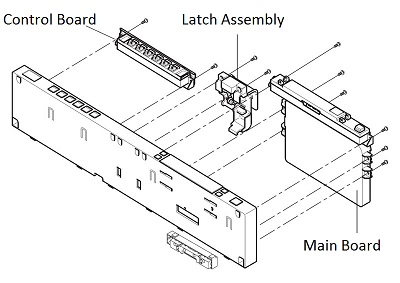
Remove the screws (12) from the perimeter of the door. The cover will drop, so have a blanket or pad on the floor to prevent damage to it.
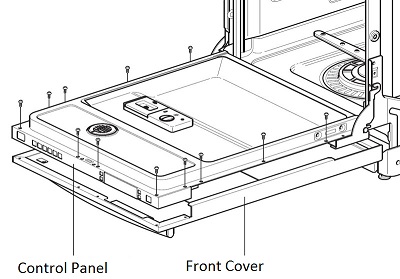
Remove the screws (2) at the latchhook. This will release the control panel and latch assemblies.
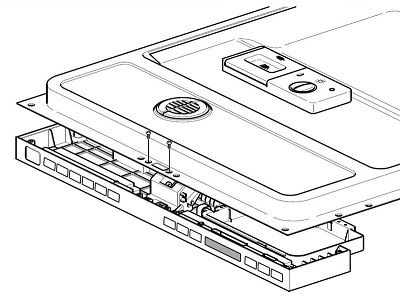
At this point, the control boards, latch assembly, and main board can be removed for repair or replacement.
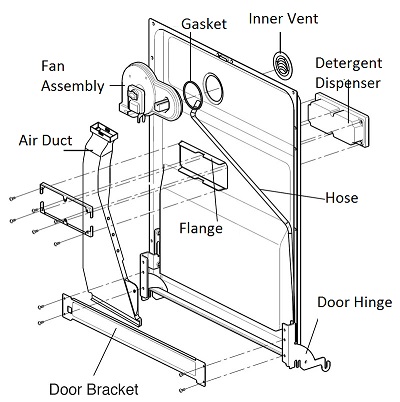
With the door disassembled as described on the previous page, remove the screws (4) securing the door bracket.
Remove the ground screw and ground wire.
Remove the wire connections for the fan and for the detergent dispenser.
Remove the air duct. Turn the inner cover counterclockwise to remove it.
Close the door.
Remove the screws (6) and brackets (2) securing the dispenser.
Pry the dispenser out using a screwdriver.
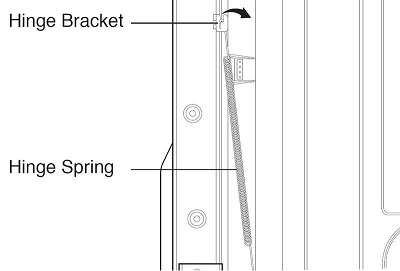
Close the door.
Lift the spring end upward and off the hinge bracket.
Watch for sharp edges on the door and tub.
Do not let the hinge spring release uncontrolled.
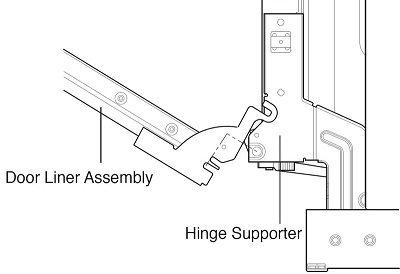
Open the door.
Lift the door liner and remove it from the hinge supporter.
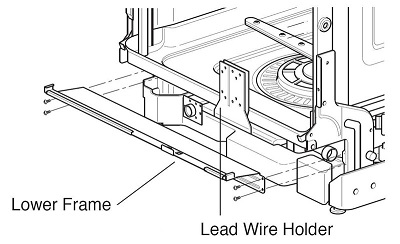
Remove the screws (4) to remove the lower frame member.
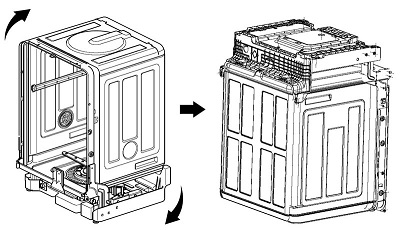
While some technicians like to turn the dishwasher over (180°) to work on it, many find it is much easier simply to pull it out from under the counter and lean it back. This eliminates the mess caused by spillage when inverting the dishwasher.
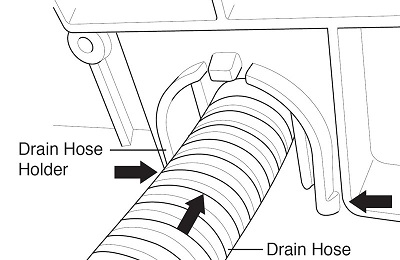
The drain hose snaps into place in its holder where it exits the base of the dishwasher. You won’t need to remove this hose from its holder unless you are replacing the entire hose.
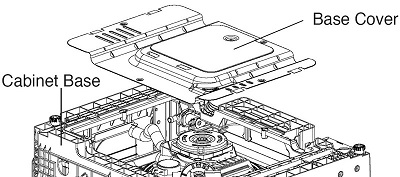
Remove the screws (2) and remove the base cover. It may require flexing the cover slightly to get all the tabs from under their brackets.
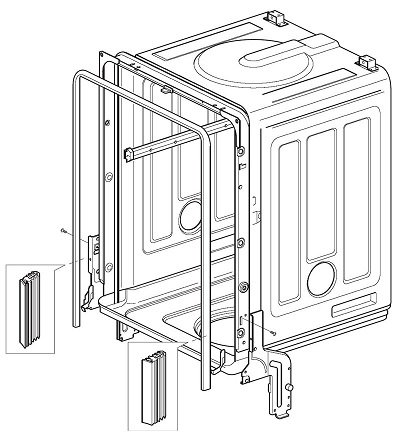
The door gasket and hinge support pieces must be in place to prevent any leakage. They can be slipped into place easily.
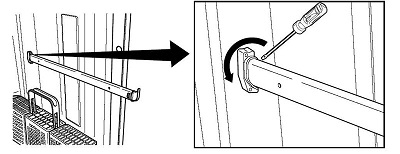
The rails that support the center and top racks can sometimes be removed by prying the plastic clip off the tub wall.
Insert a screwdriver tip and rotate it away from the tub at the top of the clip.
Usually, the plastic end pieces are broken, so LG recommends having replacements available.
Questions? Comments! Concerns? Report an error?
Let us know!
An e-mail should solve the problem.